Firing Ceramics
|
Firing ceramics artwork is the process that changes soft, fragile clay into hard, lasting ceramic. In most school studios, this happens in two main stages: the bisque fire and the glaze fire. Students often see the clay before and after each stage, but the kiln does the important work behind the scenes.
By the end of both firings, the artwork becomes stronger, more durable, and ready for display or use. |
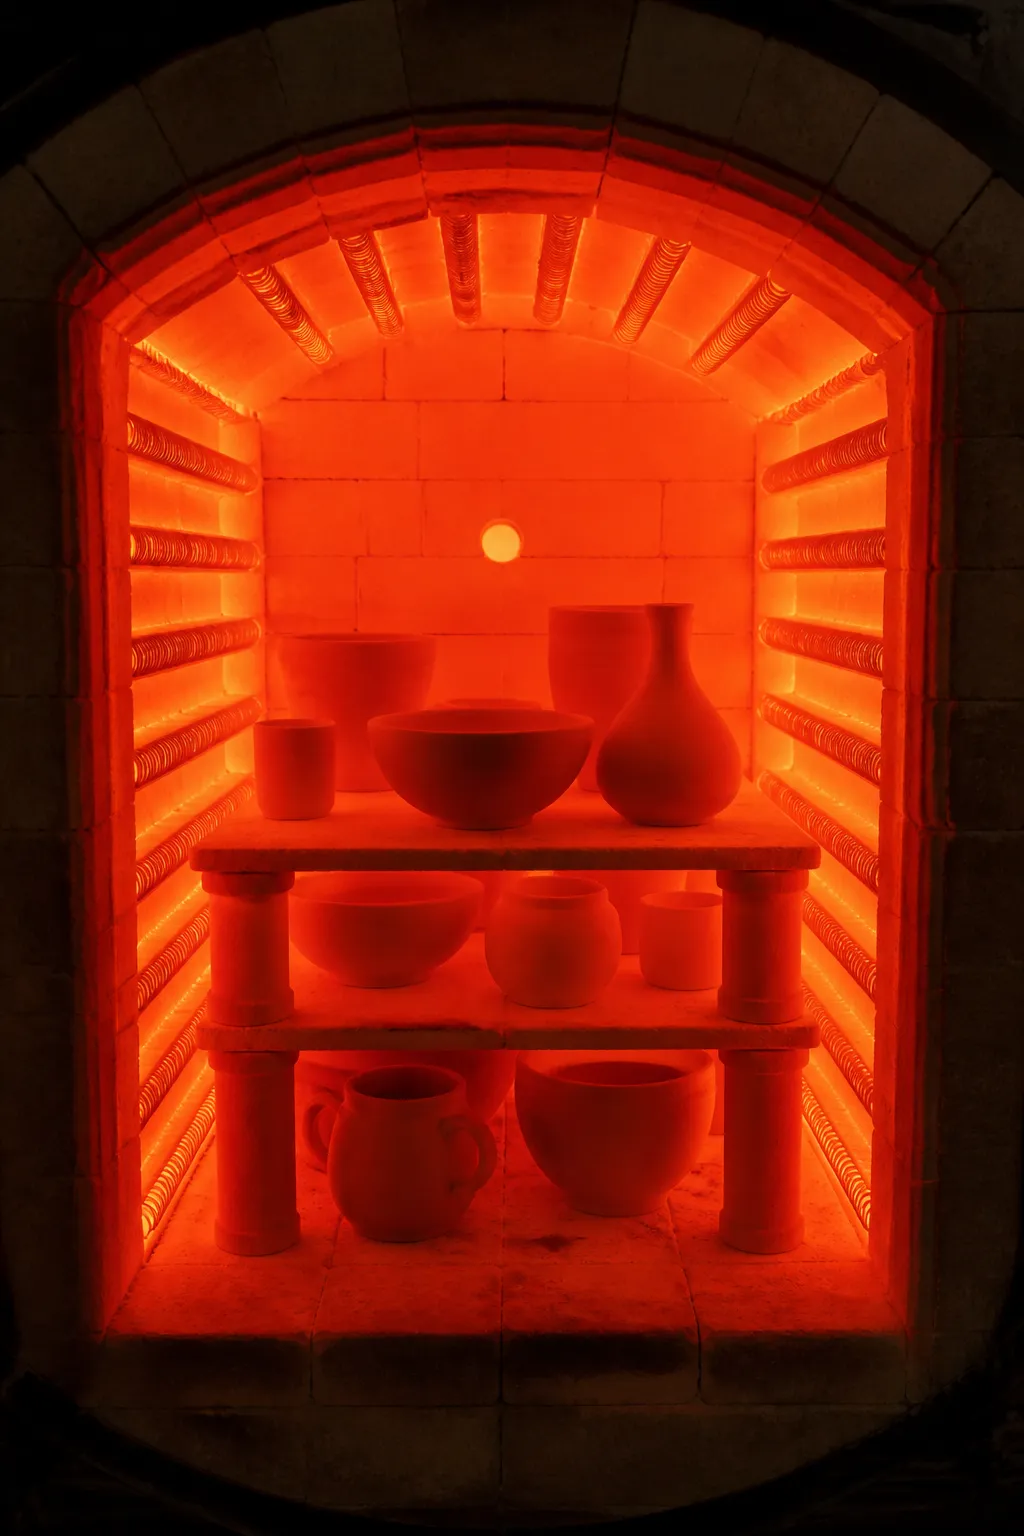 This interior view of an electric kiln shows that pottery becomes red hot. The kiln heating elements are visibly glowing in the kiln walls. This interior view of an electric kiln shows that pottery becomes red hot. The kiln heating elements are visibly glowing in the kiln walls. |
Plastic Clay
|
• Clay begins as a workable material made from very fine particles mixed with water. The malleable character of wet clay is called plasticity. In class, students shape this material into bowls, tiles, sculptures, or another ceramic project. At this stage, the clay is called greenware if it has dried but has not yet been fired. Greenware may look finished, but it remains extremely delicate. Even a small bump can crack or break it. This is why firing ceramics artwork is such an important part of the process: it creates a permanent transformation that simple air-drying cannot achieve. |
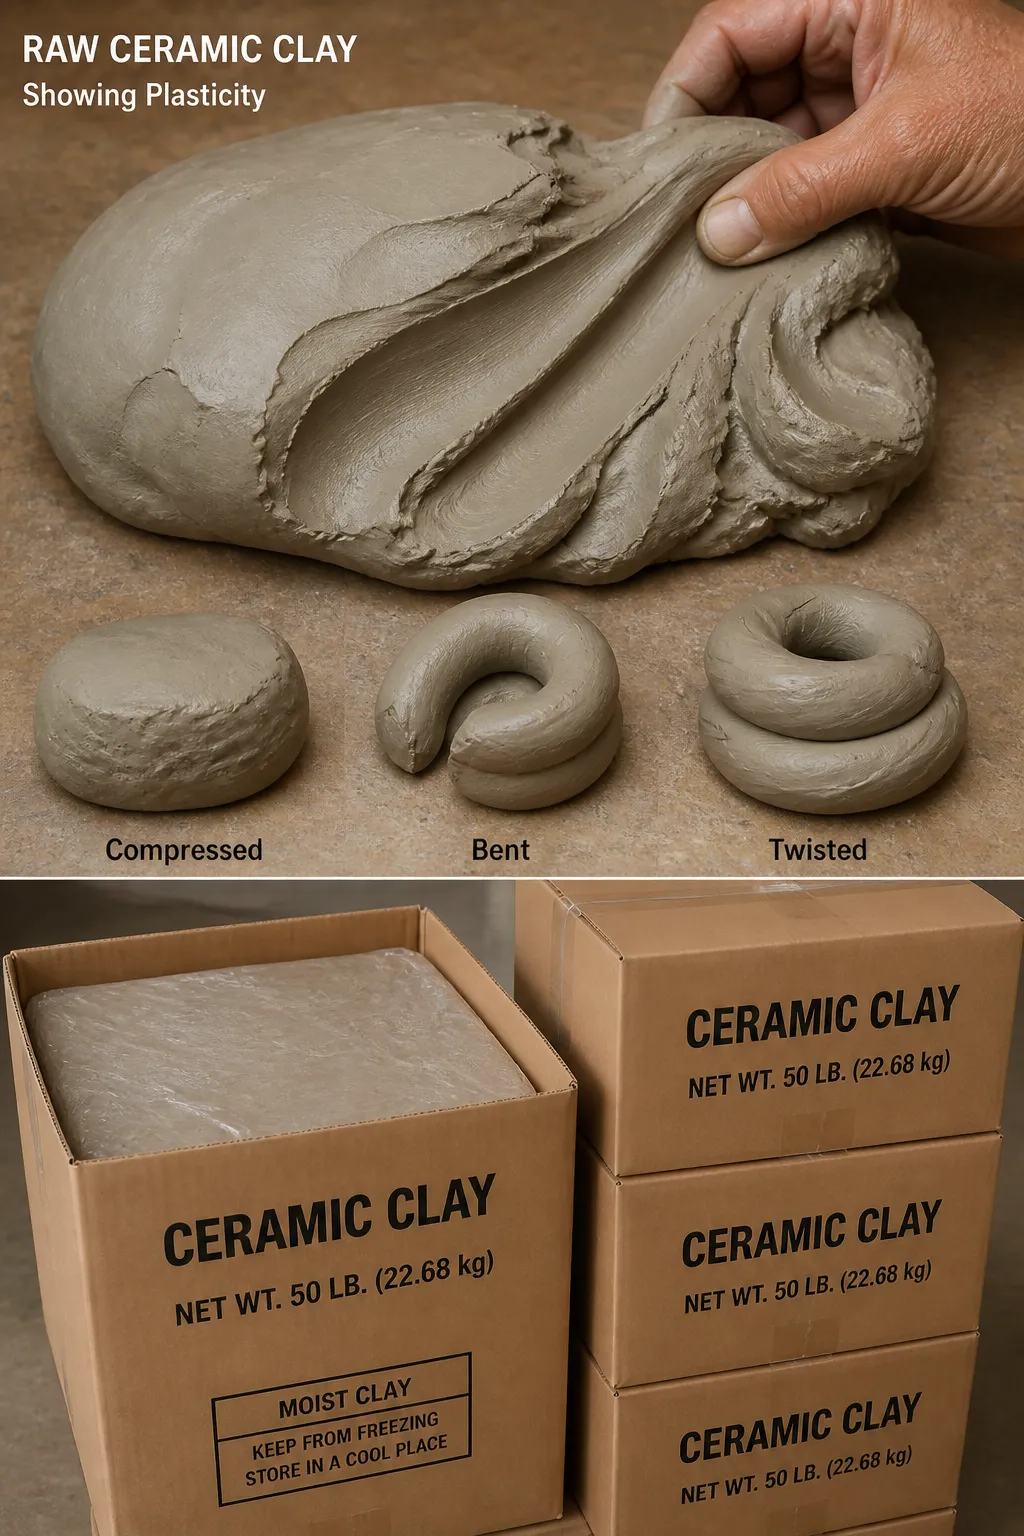 Plastic clay is usually delivered in 50 pound boxes. Plastic clay is usually delivered in 50 pound boxes. |
• Before any firing begins, the clay piece must dry completely. Artists usually allow work to reach what is called bone-dry condition. Bone-dry clay feels room temperature or slightly cool at first, then dry all the way through, and it often looks lighter in color than wet clay. If water remains trapped inside the clay, the heat of the kiln can turn that water into steam too quickly. Steam expands with force, and that pressure can cause the piece to crack or even explode in the kiln. For this reason, careful drying is the first essential step.
Bisque Firing
|
• Once the work is fully dry, the teacher or kiln operator prepares to load the kiln. Loading a kiln requires planning, patience, and attention to safety. Each piece must sit securely on a kiln shelf so it does not tip as heat rises. Pieces should not touch one another, because clay can shift slightly during firing, and crowded work is more likely to break. Taller forms need enough vertical space, and fragile handles or thin edges should be protected from accidental contact. Good loading supports even heating throughout the kiln chamber. |
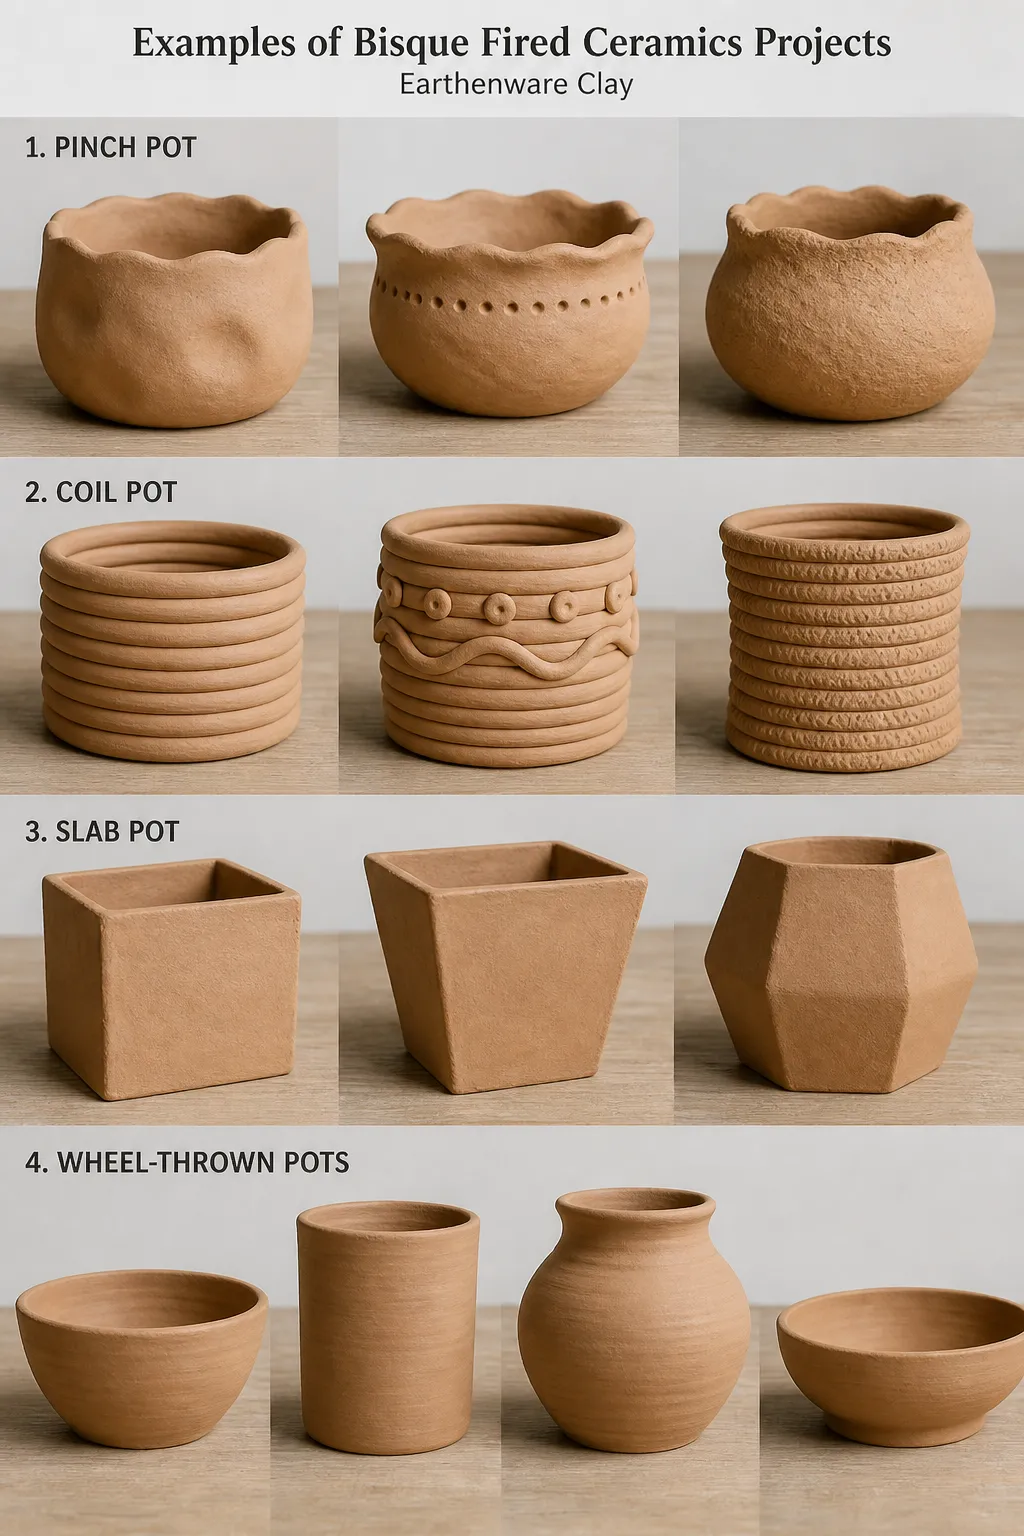 These projects are once-fired - they are bisque ware. They are durable and porous. They are ready to receive a coating of glaze before the second firing. These projects are once-fired - they are bisque ware. They are durable and porous. They are ready to receive a coating of glaze before the second firing. |
• Kiln shelves and
posts help create levels inside the kiln. The kiln operator places posts
between shelves so multiple layers of student work can fit inside.
Heavy or large pieces usually go on lower shelves, where they are easier
to place safely. Smaller items may go above them if there is enough
room. The operator also checks that no piece touches the kiln walls,
heating elements, or thermocouple. This arrangement matters because
proper spacing allows heat to circulate. In most art classes, students
do not load the kiln themselves, but understanding this stage helps them
see why preparation affects results.
• The first firing is
called the bisque fire, sometimes written as biscuit firing. Its main
purpose is to turn dry clay into a hard, porous ceramic material that
can be handled and glazed more easily. In school settings, bisque firing
often reaches about 1,800°F to 1,950°F, which is roughly 980°C to
1,065°C. The kiln heats gradually rather than all at once. This slow
rise in temperature protects the clay, allows remaining moisture to
leave safely, and begins the chemical and physical changes that make the
piece permanent.
• During the early part of the bisque fire, the
kiln removes physical water that remains in the clay. As temperature
rises further, the clay also loses chemically bonded water from its
mineral structure. This change is important because the clay can no
longer return to its original soft, wet state. Organic materials in the
clay burn away, and the particles begin to bond more tightly. Students
may not see these transformations happening, but it explains why fired
clay feels so different from unfired clay.
|
• As the bisque kiln approaches its top temperature, the clay begins to sinter. Sintering means the particles start to fuse together without fully melting. This makes the piece harder and stronger than greenware while still leaving it porous enough to absorb the water in a glaze solution. That porosity is useful because glaze, which is a liquid suspension of minerals and water, needs to cling to the surface before the second firing. After the bisque fire, the artwork is called bisqueware. It is much safer to handle than greenware, yet it still requires care. |
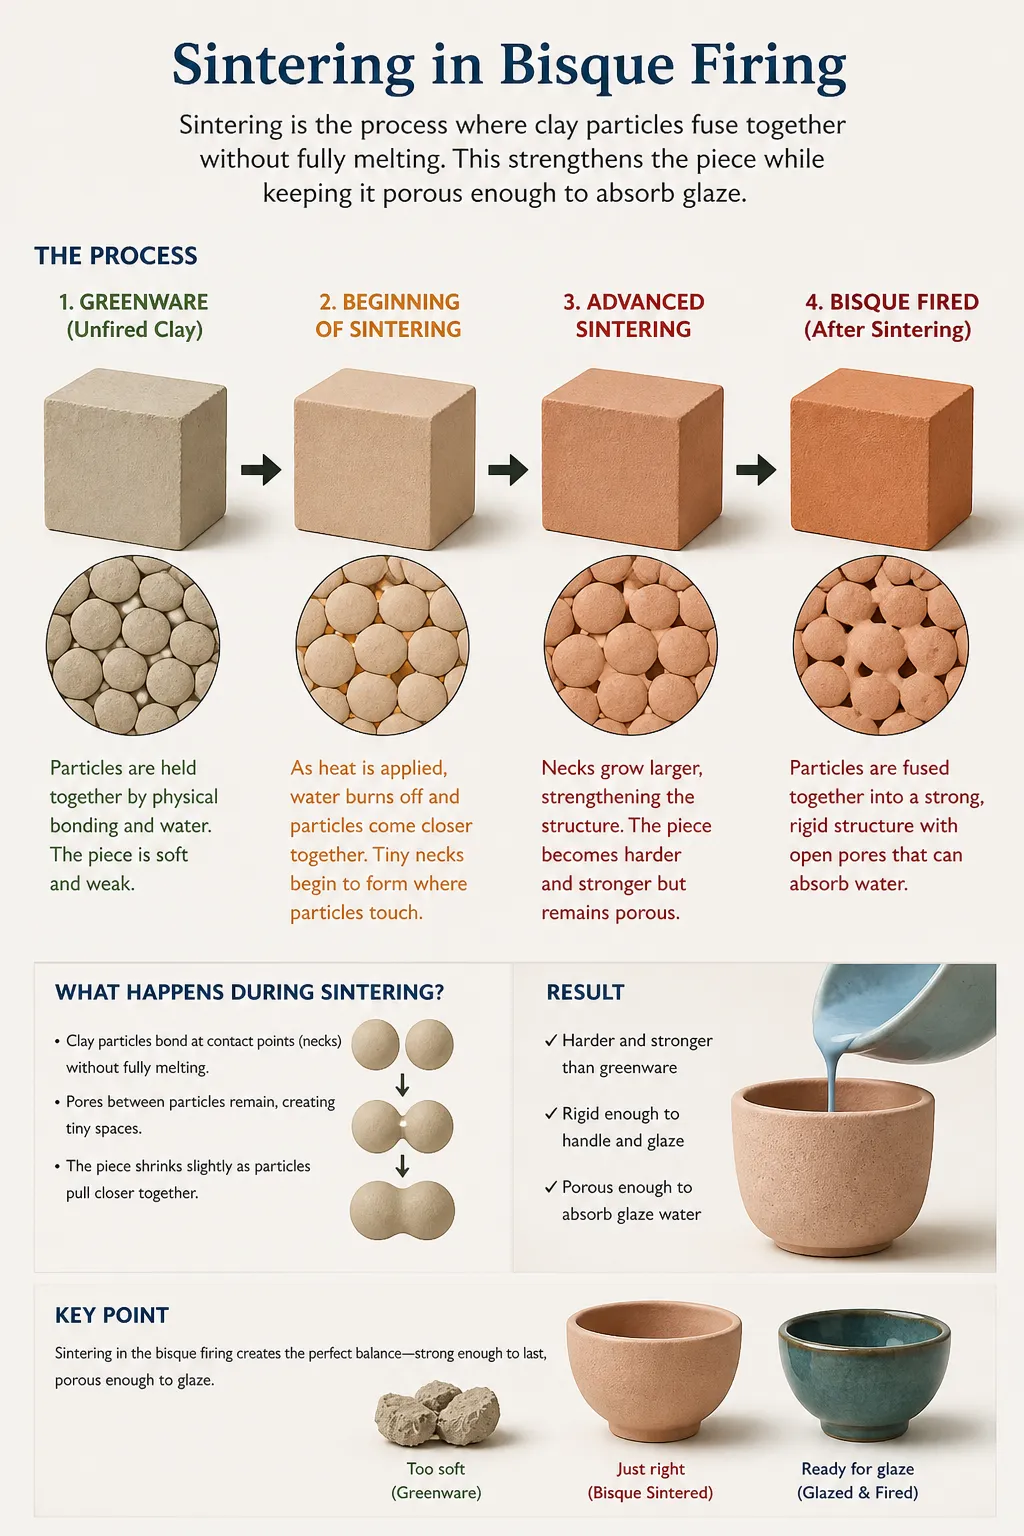 Sintering in the bisque firing creates the perfect balance - strong enough to last, porous enough to glaze. Sintering in the bisque firing creates the perfect balance - strong enough to last, porous enough to glaze. |
• After the kiln reaches the target temperature for bisque, it does not get opened immediately. The kiln must cool slowly, for eight hours or more. Rapid temperature changes can stress ceramic pieces and lead to cracking. Teachers often wait until the kiln temperature drops to a safe level before opening it. When students see their work after the bisque fire, they usually notice several changes. The clay is harder, lighter in weight than it seems, and often different in color. A gray clay may turn buff, red clay may deepen in tone, and the overall surface looks dry and chalky.
Glaze Firing
• The bisque fire is only the first half of the full process. Ceramics
are often fired twice because each firing serves a different purpose.
The first firing hardens the clay enough to survive handling,
decorating, and glazing. The second firing melts the glaze and bonds it
to the ceramic surface. If artists tried to apply glaze to unfired
greenware, the fragile clay could break easily, and the glaze
application could damage the piece. By separating the process into two
firings, potters gain more control and improve the chance of success.
•
Before glazing begins, artists usually inspect the bisqueware
carefully. They may smooth rough spots lightly, wipe away dust, and
check for cracks that developed in the kiln. Clean surfaces matter
because glaze sticks best to dust-free bisque. Students then apply glaze
by brushing, dipping, or pouring, depending on the project and the
studio setup. Glaze may look dull, powdery, or pale before firing, which
often surprises beginners. Its final color and texture usually do not
appear until the glaze fire is complete.
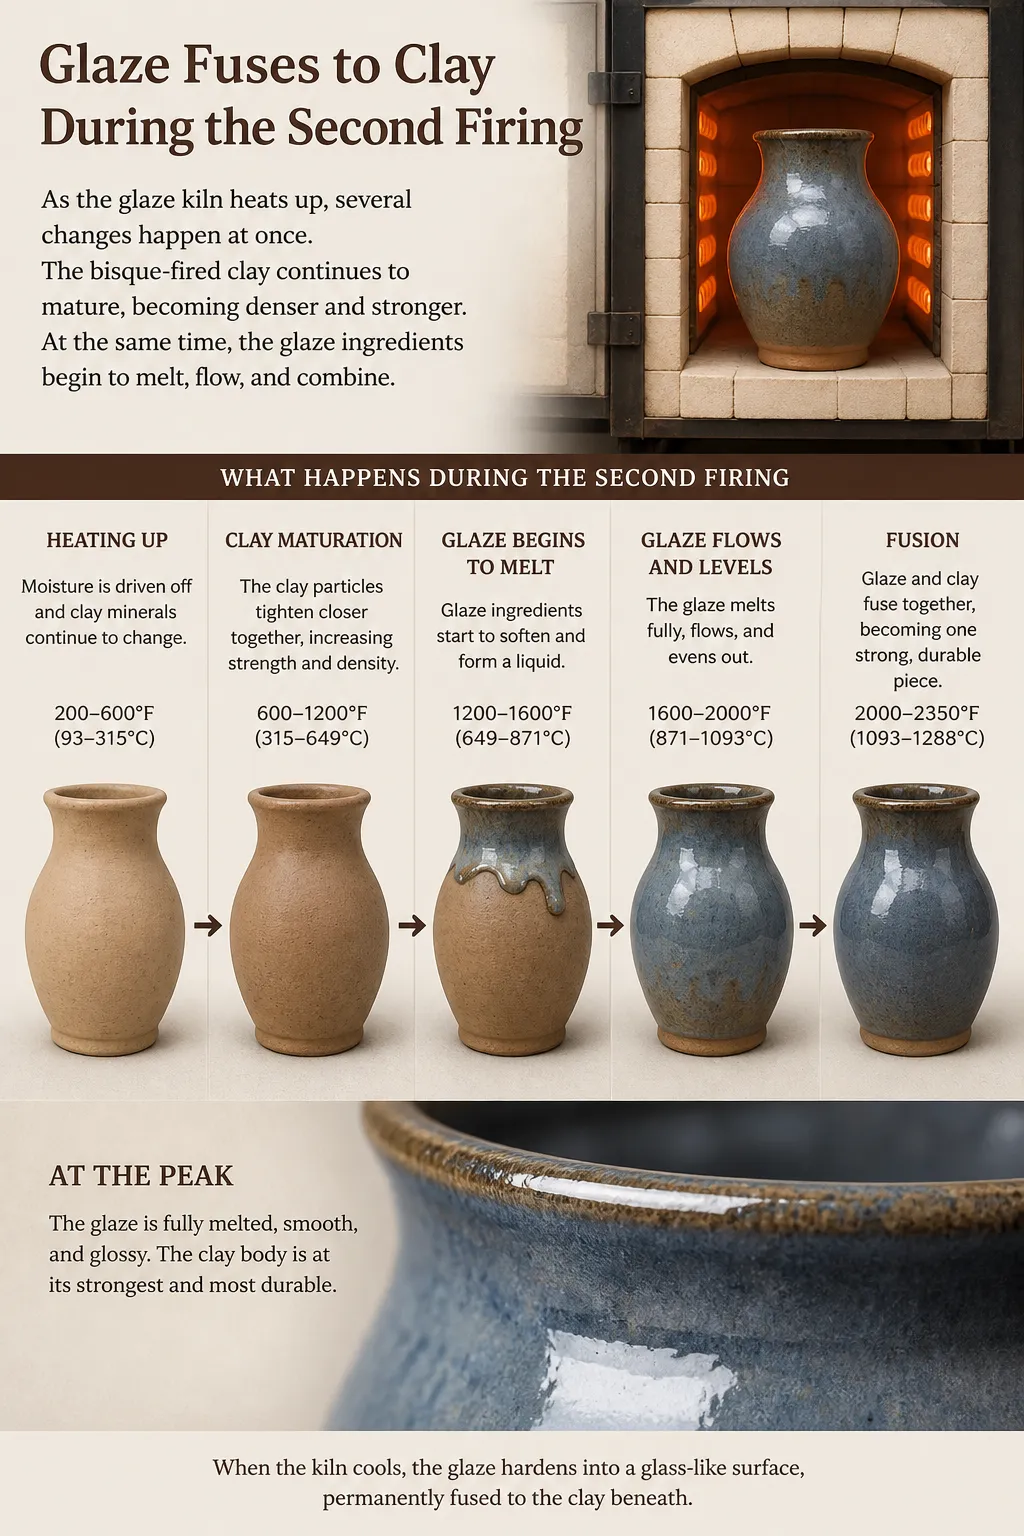 Glaze and clay fuse together at the right temperature. The result is clay that has become permanent with a thin glass-like coating.
• Glaze is more than
paint. It contains silica, fluxes, and other minerals that react to
heat. In the glaze fire, these materials melt and form a glasslike
coating on the clay surface. This coating can make the piece colorful,
smooth, shiny, matte, or textured. It can also make some functional ware
less absorbent. For students, this stage often feels the most exciting
because the kiln reveals major visual changes. In firing ceramics
artwork, the glaze fire is the moment when the surface becomes fully
developed.
• Loading the kiln for the glaze fire requires even
more care than loading for bisque. Glazed pieces cannot touch each other
because glaze melts and becomes sticky. If two glazed pieces touch,
they can fuse together permanently. The kiln operator also leaves the
bottoms, or foot rings, free of glaze so the piece does not stick to the
shelf. If glaze accidentally covers the base, the operator may clean it
off before firing. This step protects the kiln furniture and prevents
damage to both artwork and equipment.
• The temperature of the
glaze fire depends on the clay body and the glaze recipe. In many school
studios using low-fire materials, the glaze fire may reach about
1,820°F to 1,940°F, or roughly 993°C to 1,060°C. In studios using
mid-fire materials, it may rise to about 2,160°F to 2,300°F, or around
1,180°C to 1,260°C. Teachers choose temperatures that match the
materials being used, such as earthenware, stoneware, and porcelain.
This matching is essential because clay and glaze must mature together.
If they do not, the surface may craze, blister, run, or fail to bond
properly.
• As the glaze kiln heats up, several changes happen at
once. The bisque-fired clay continues to mature, becoming denser and
stronger. At the same time, the glaze ingredients begin to melt, flow,
and combine. Colorants in the glaze can also develop differently at
higher temperatures, which is why fired results may differ from the
unfired appearance. By the peak of the firing, the glaze forms a sealed
surface. Once the kiln cools, that melted coating hardens into the final
finish that students recognize on completed ceramic work.
•
Cooling remains just as important in the glaze fire as in the bisque
fire. If the kiln cools too quickly, the clay and glaze may contract at
different rates. This mismatch can create stress, cracks, or surface
problems. Slow cooling gives materials time to stabilize. It can also
affect the final appearance of some glazes, especially those that
develop crystals, mottling, or layered color effects. Although students
may focus on peak temperature, the cooling stage is part of the firing
result and should be understood as an active phase of the process.
Finished Projects
• After the glaze fire, the finished piece usually looks very different from the original clay form. The object is harder, more permanent, and often more vivid in color. Glossy glazes reflect light, matte glazes soften it, and transparent glazes allow clay texture or underglaze decoration to show through. The clay body itself has changed from a soft, water-based material into a ceramic material that will not dissolve in water. This final result is the main goal of firing ceramics artwork: to transform a temporary object into lasting artwork.
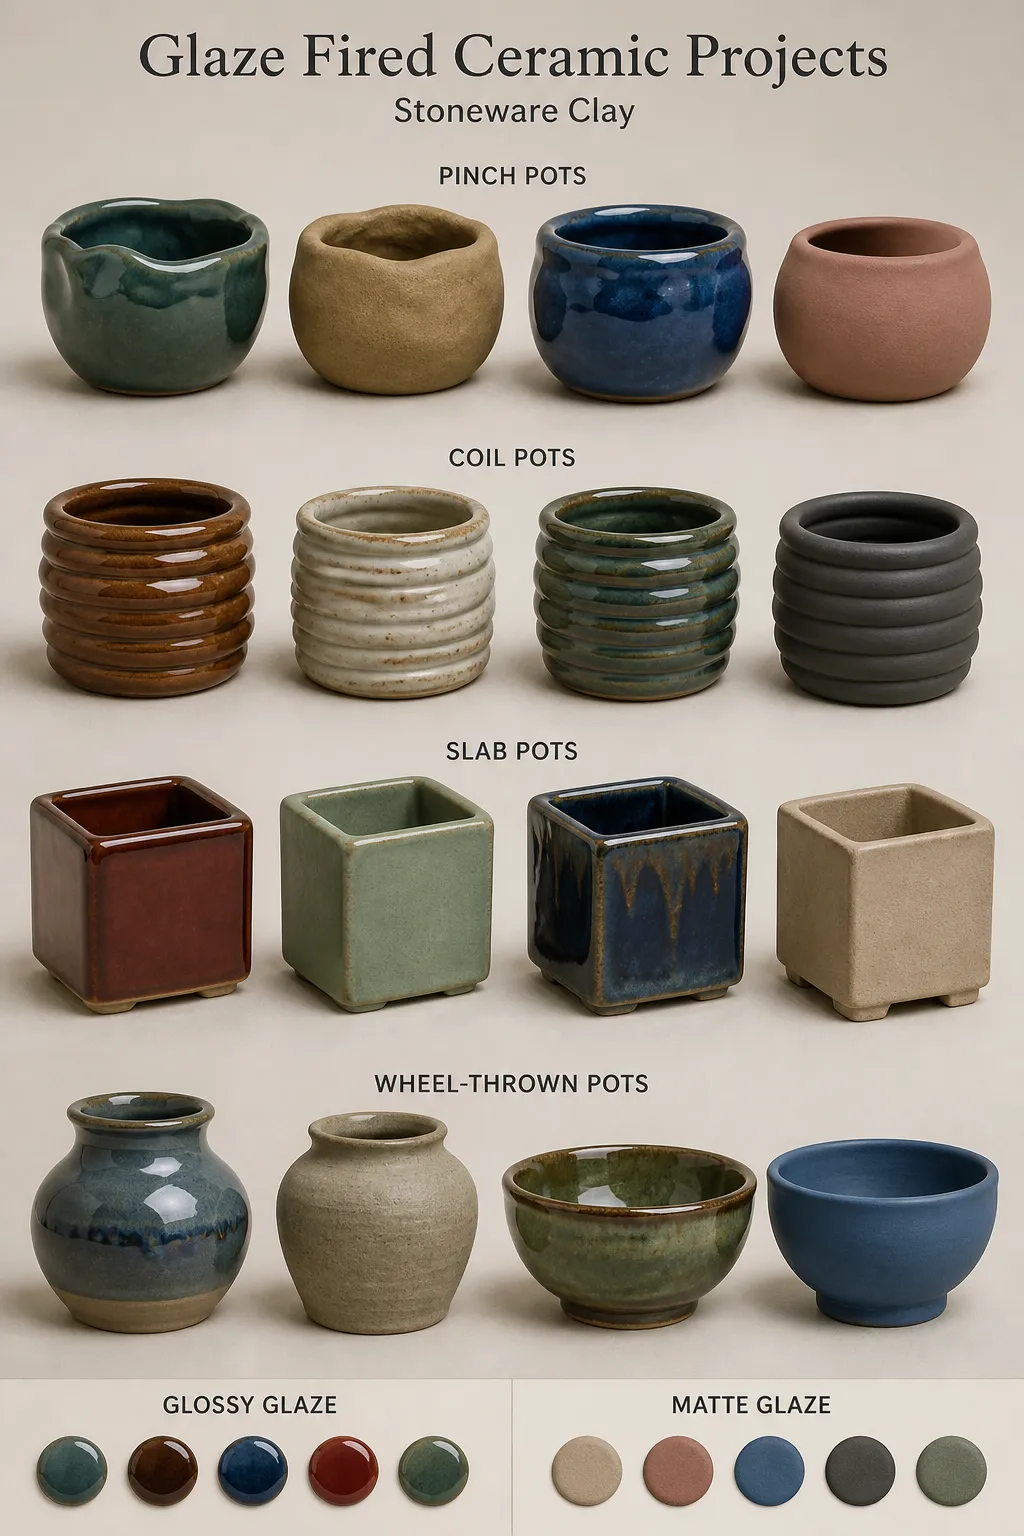 Glaze fired projects may have a variety of colors. You also may choose between glossy and matte glaze finish.
• Students should also understand that firing does not simply dry clay; it changes it chemically and physically. Drying removes ordinary water, but firing rearranges the material in a much deeper way. Once the clay minerals lose chemically bonded water and the particles fuse, the transformation cannot be reversed. Fired clay cannot be rehydrated into workable clay again. This one-way change is what makes ceramics distinct from many other art forms. A drawing can be erased, but a fired ceramic form becomes a permanent record of the maker’s choices.
Tips
• Problems can occur during either firing, and those problems often begin much earlier in the process. Thick areas may dry unevenly and crack. Trapped air or moisture can cause breakage. Glaze applied too thickly may drip, while glaze applied too thinly may look weak or patchy. Pieces placed too close together may warp or stick. These risks show why ceramic artists follow steps in order and with care. A successful ceramic project depends not only on creativity but also on patience, timing, and technical understanding.
• In a classroom, students may not operate the kiln, yet they still play a major role in the success of the firing. They can build forms with even walls (seeking uniform thickness), attach parts securely, hollow out thick sculptures when appropriate, and let work dry fully before submission. They can also apply glaze neatly and keep the bottom of the piece clean. These actions support the kiln process, even when the teacher completes the actual firing. Many art lesson plans introduce these habits early because they help students connect studio choices with final outcomes.
• Chronologically, the firing process follows a clear sequence:
- make the clay form,
- dry it completely,
- load the kiln carefully,
- complete the bisque fire,
- cool and unload the bisqueware,
- apply glaze,
- reload the kiln with special attention to spacing and clean bottoms,
- complete the glaze fire,
- cool the kiln again, and
- finally unload the finished work.
This sequence explains why ceramic work takes time. Unlike some media, clay cannot be rushed without consequences. Each stage prepares the next one, and each firing changes what is possible afterward.
Summary
• For secondary students who are new to ceramics, the most important idea is that firing is the stage that gives clay its final strength and character. The bisque fire, usually around 1,800°F to 1,950°F, turns bone-dry clay into porous bisqueware. The glaze fire, often around 1,820°F to 1,940°F for low-fire work or higher for mid-fire work, melts the glaze and finishes the piece. Ceramics are fired twice because the first firing prepares the clay, and the second completes the surface. When the process is done well, the result is a durable, expressive artwork that preserves the student’s design in a lasting form.
Firing Vocabulary
|
bisque bisque fire bone-dry clay body foot ring fuse |
glasslike glaze glaze fire greenware kiln plasticity |
porous rehydrated sinter thermocouple underglaze unfired ware |