Wedging Clay
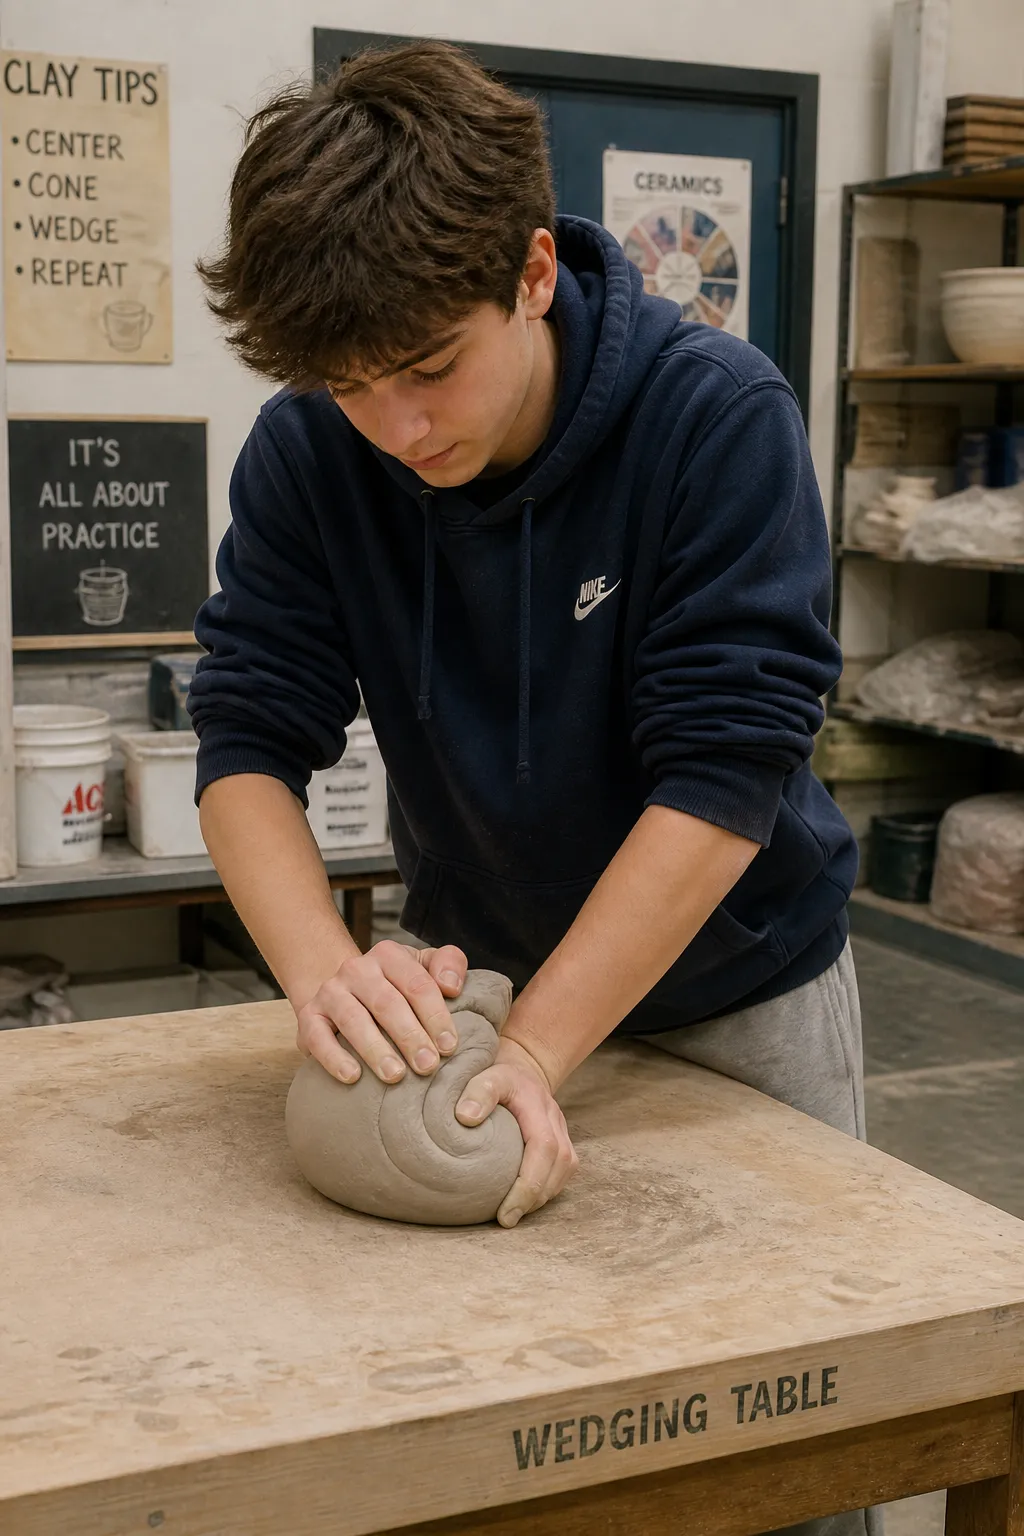
- Preparing clay correctly is one of the most important steps in
ceramics. Before a student starts handbuilding or throwing on the wheel,
the clay must be made ready for use. In most classrooms, that
preparation includes wedging, a controlled method of pressing and
turning clay to improve its condition. When students learn this skill,
they reduce problems later in the project and gain better control over
the material.
- Clay often changes while it is stored,
transported, or recycled. It can become uneven in moisture, trap air
pockets, or develop a texture that feels stiff in one area and soft in
another. The wedging process helps correct these issues. By working
the clay on a sturdy surface, students make the clay more uniform and
more responsive to shaping.
Purpose
|
- The main purpose of wedging is to prepare clay so it performs well during building and firing. Wedging blends the moisture throughout the clay body, removes many air pockets, and aligns the particles into a more workable mass. When clay is properly wedged, it usually feels smoother, more consistent, and easier to shape into a successful project. |
Uniform density keeps pottery from warping or cracking as it dries. |
Wedging is not the same as random kneading. In
ceramics, wedging follows a method. It uses repeated motion to compress,
fold, and move the clay in a pattern. This controlled action improves
the clay more effectively than simply squeezing it in the hands. Good
wedging saves time because it helps prevent cracks, weak spots, and
uneven forming and drying later.
|
Air pockets are a major reason teachers may require wedging ceramic clay before use. Small trapped bubbles may not seem serious at first, but they can create serious problems. During forming, they may cause weak areas. During firing, heated air and moisture inside the clay can expand. In some cases, that pressure can crack a piece or even cause it to break in the kiln. |
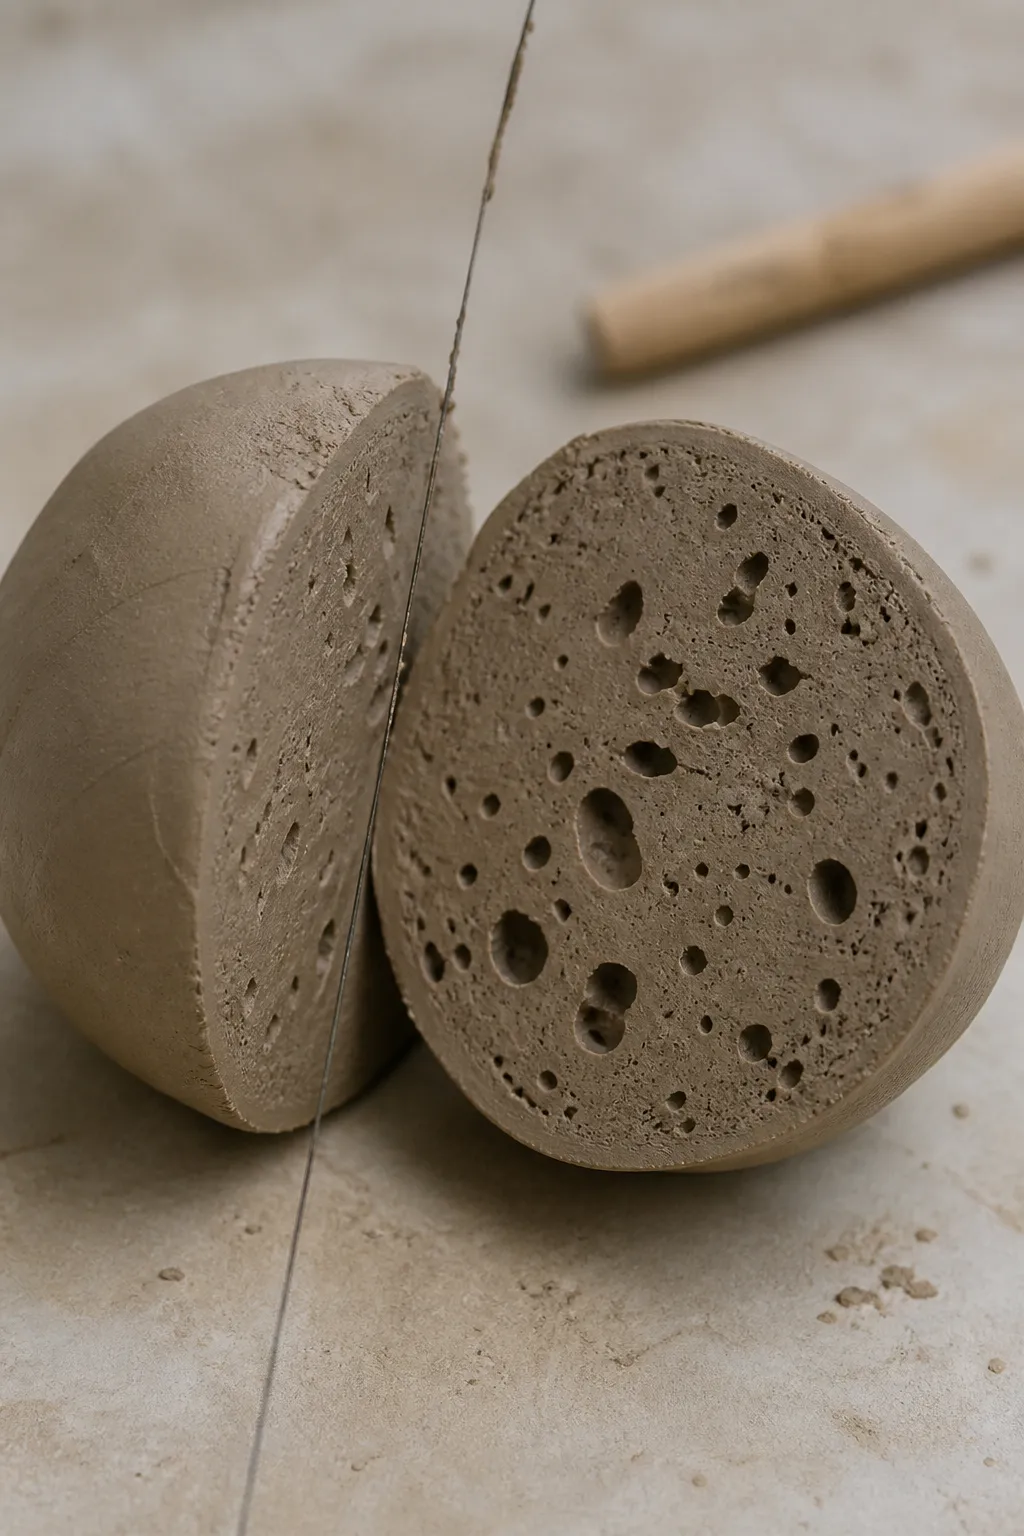 Air pockets in your clay will weaken your projects. Air pockets in your clay will weaken your projects. |
Wedging
also helps equalize moisture content. If one part of the clay is wetter
than another, the project may not behave evenly. A wetter section can
slump, stretch, or shrink differently from a drier section. By wedging,
students combine different consistencies into one homogeneous mass. Such consistency is
especially important when making functional forms such as bowls, mugs,
tiles, or sculptural forms with joined parts.
Another important
result of wedging is improved workability. Clay that has been prepared
well responds more predictably to pressure from the hands, tools, or manipulation on the potters wheel. A student can roll coils more evenly, flatten slabs more
smoothly, and center clay on the wheel with greater success. The process
does not guarantee perfection, but it creates better conditions for
learning and craftsmanship.
Types of Wedging
In many art rooms, teachers can introduce several types of wedging. The most common kinds include the following:
- Ram’s head wedging
- Spiral wedging
- Stack-and-slam wedging
- Cut-and-slap or cut-and-wire wedging
Each method aims to prepare the clay, but each uses a different movement pattern. Choose one or two methods that best match your skill level, available work space, classroom time, and teacher recommendation.
|
Ram’s head wedging is one of the most widely taught methods for beginners. In this technique, the student pushes the clay forward and downward, then rolls it slightly back toward the body. The repeated motion creates layered folds that resemble the shape of a ram’s forehead. This method is effective for blending moisture and compressing the clay into a smooth, unified form. |
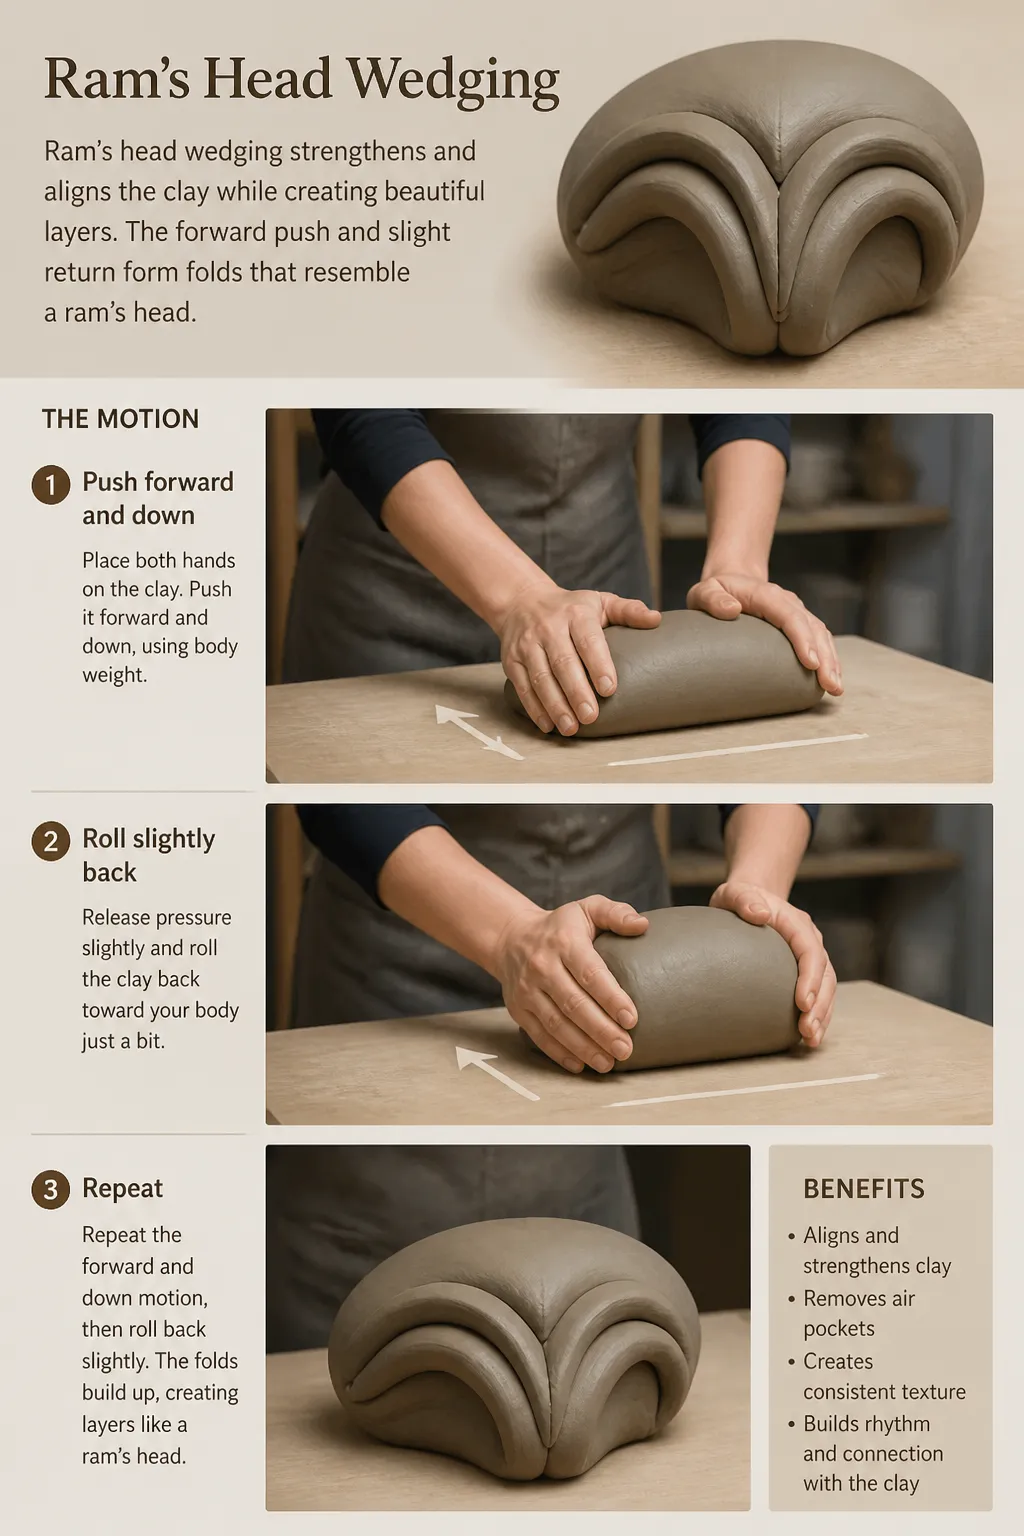 To begin ram’s head wedging, students can follow these steps:
- Form the clay into a rough ball or short block
- Place it on the wedging surface
- Put both hands on the top front of the clay
- Push the clay forward and down
- Roll or fold the top edge back toward the center
- Rotate the clay slightly if needed and repeat
- The movement should be smooth and rhythmic. Students should avoid trapping new air by folding the clay carelessly.
To begin ram’s head wedging, students can follow these steps:
- Form the clay into a rough ball or short block
- Place it on the wedging surface
- Put both hands on the top front of the clay
- Push the clay forward and down
- Roll or fold the top edge back toward the center
- Rotate the clay slightly if needed and repeat
- The movement should be smooth and rhythmic. Students should avoid trapping new air by folding the clay carelessly.|
Spiral wedging is another much-practiced method, and many potters prefer it when preparing clay for the wheel. In spiral wedging, the hands guide the clay forward in a twisting motion so the mass develops a spiral pattern inside. This method can align the clay well and create a smooth, continuous texture. However, it often takes more practice than ram’s head wedging because the hand motion must stay steady and controlled. |
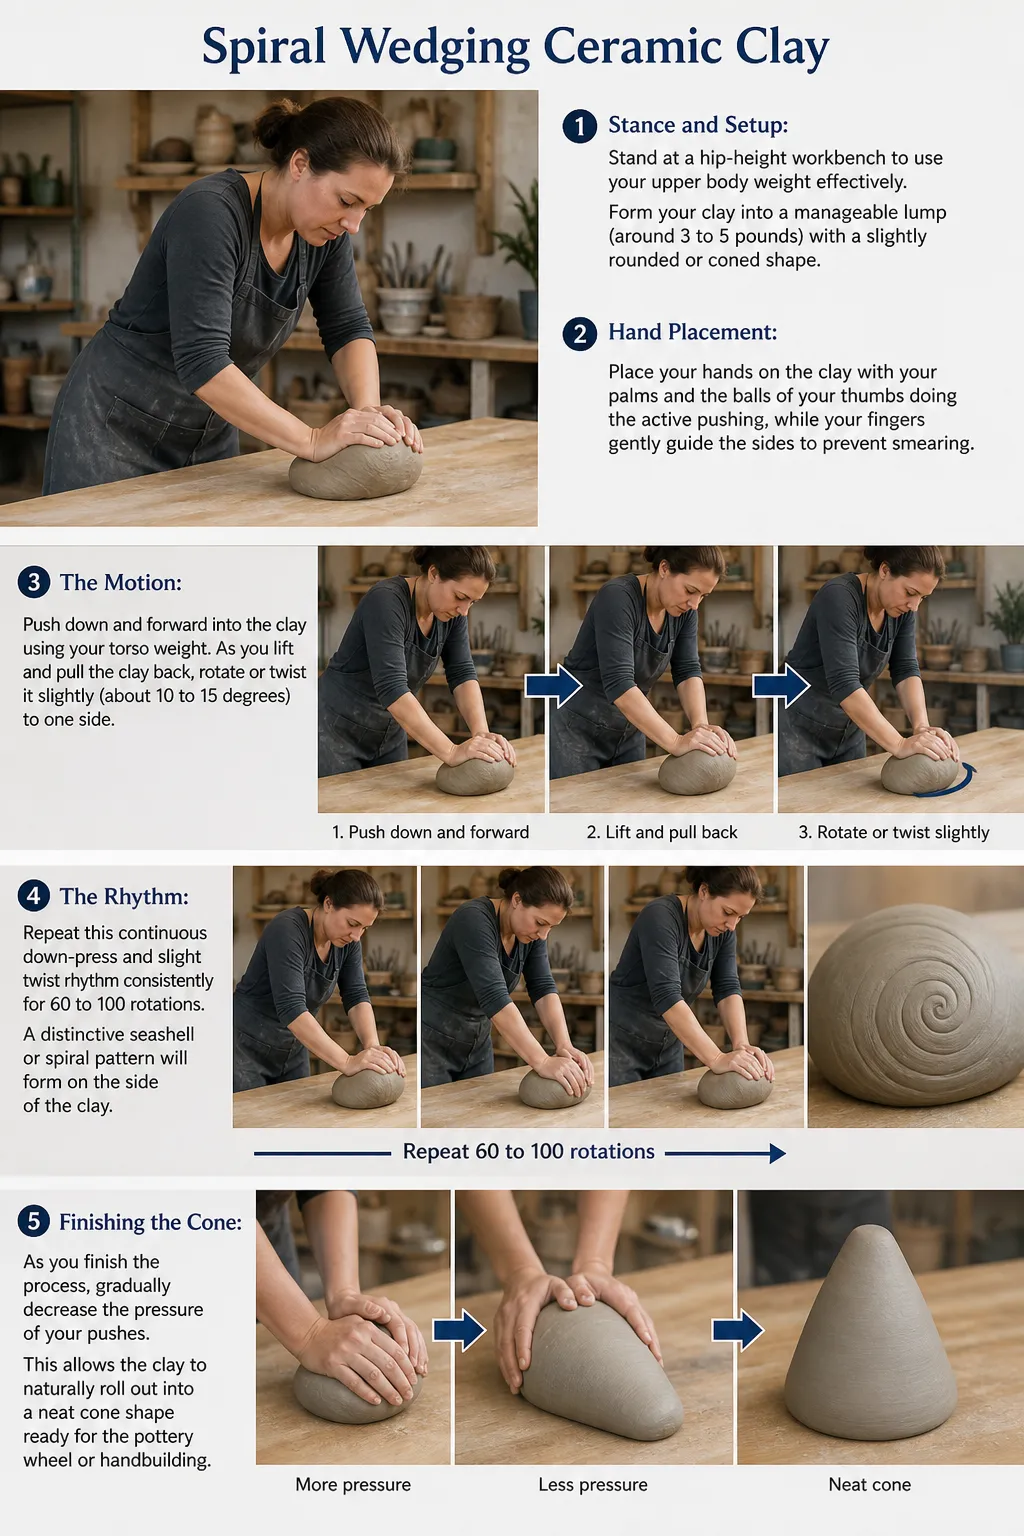 - To perform **spiral wedging**, students can follow these steps:
- Start with a compact mass of clay on the wedging table
- Place both hands so one guides and one pushes
- Push forward while turning the clay in a circular motion
- Continue the twisting motion evenly
- Watch for a cone-like shape and spiral pattern to develop
- This method may feel awkward at first. With practice, students can create a smooth spiral that shows the clay is moving in a consistent pattern.
- To perform **spiral wedging**, students can follow these steps:
- Start with a compact mass of clay on the wedging table
- Place both hands so one guides and one pushes
- Push forward while turning the clay in a circular motion
- Continue the twisting motion evenly
- Watch for a cone-like shape and spiral pattern to develop
- This method may feel awkward at first. With practice, students can create a smooth spiral that shows the clay is moving in a consistent pattern.|
Stack-and-slam wedging is often used when reclaiming clay or when a
larger amount needs quick blending. In this method, the student cuts
the clay, stacks the pieces, and slams them together repeatedly. The
action helps compress the clay and mix wet and dry sections. Teachers
may use this approach for recycled clay, though students still need to
finish with a more controlled wedging method if the clay remains rough. |
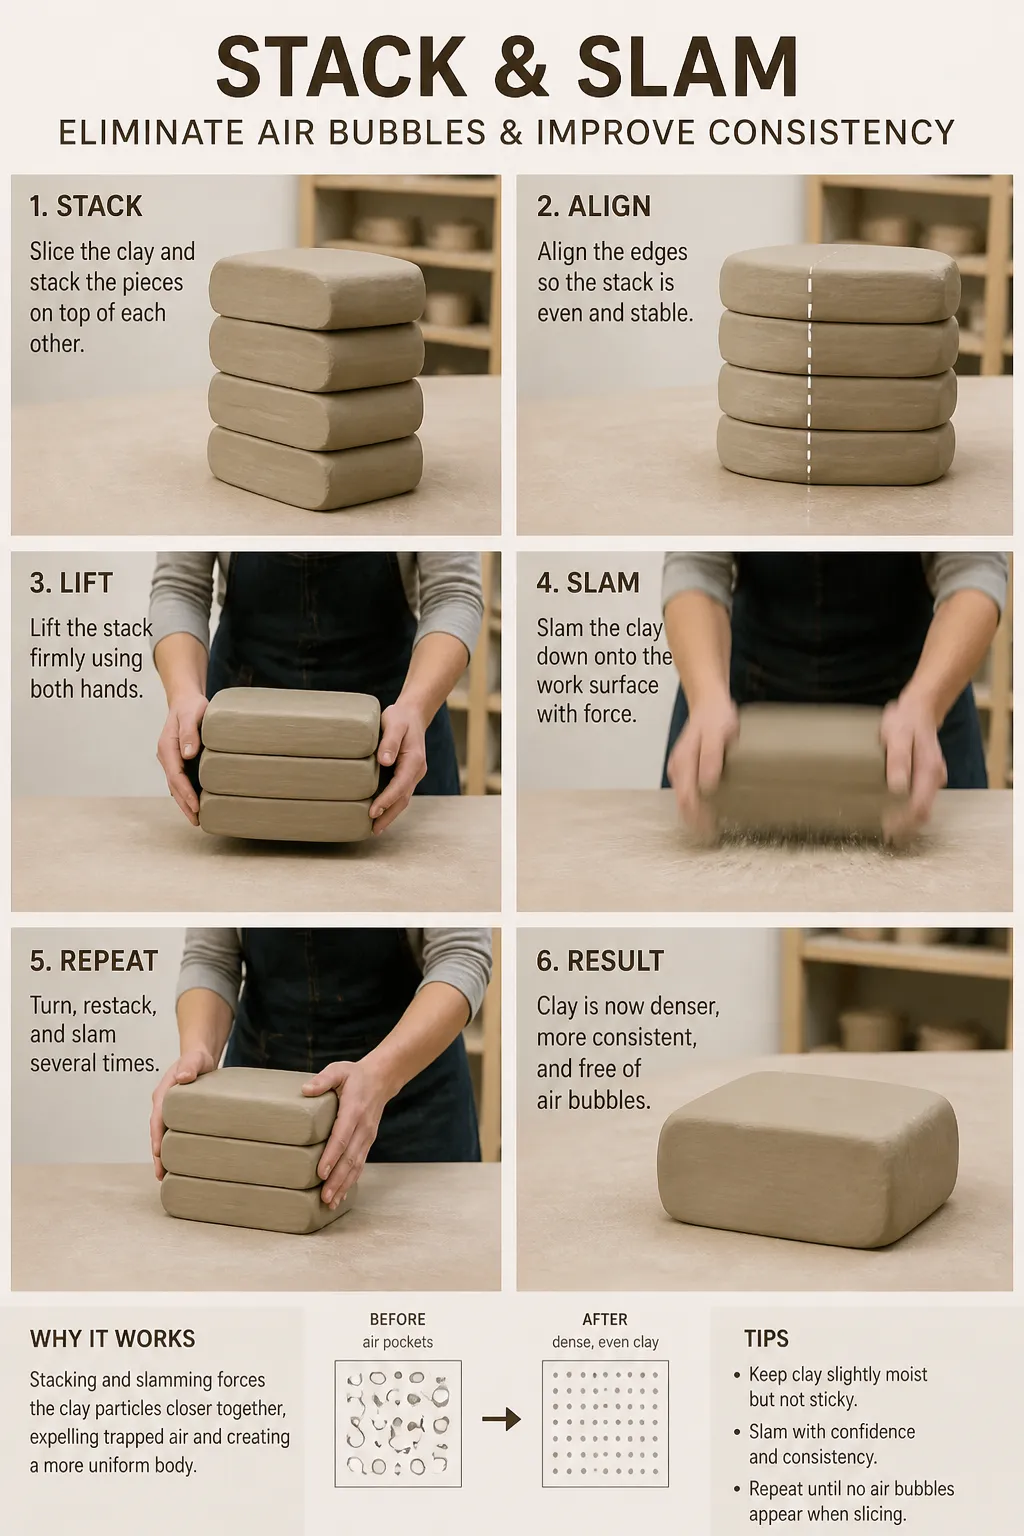 Stack and slam requires a proper, sturdy wedging table.
|
Cut-and-wire wedging uses a wire tool or cutting tool to divide the clay, then the student slaps the pieces together again. This approach helps reveal air pockets and uneven moisture. If the clay shows dry streaks, crumbly layers, or holes, cutting the clay makes those issues visible. After several repetitions, the student can move into ram’s head or spiral wedging for final preparation. |
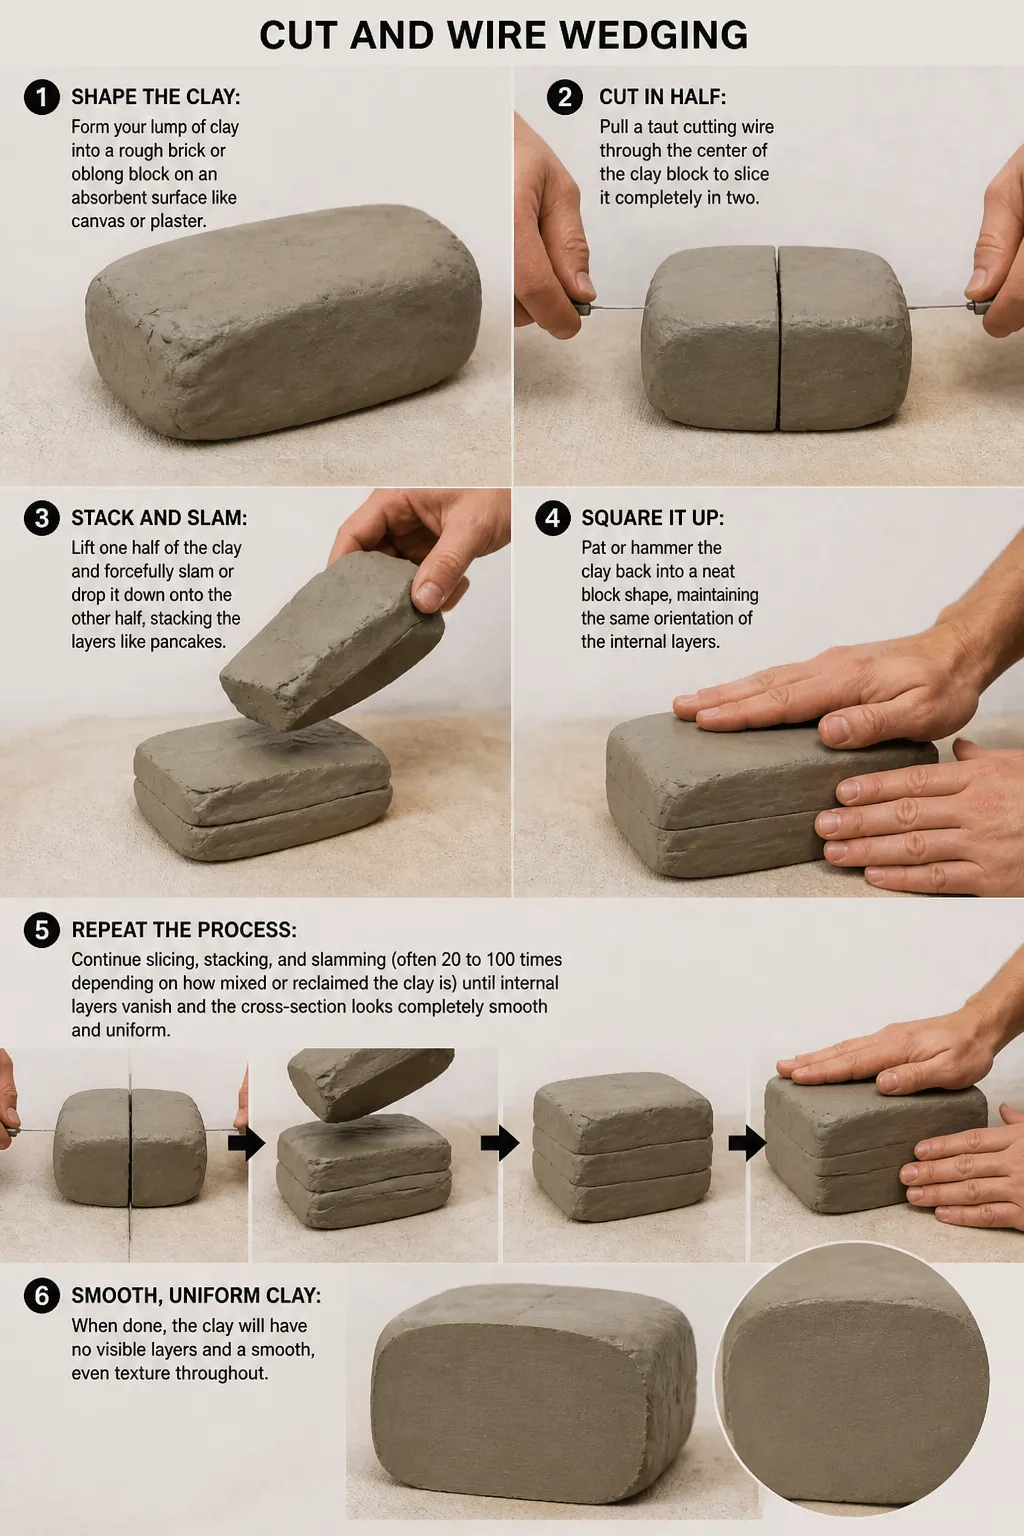 Cut and wire wedging is less likely to produce spills and sprays compared to slamming the clay together.
Ready, set, wedge ...!
- Before starting, students should gather the right materials and set up a safe workspace. Useful items include:
- A clean, sturdy wedging table or canvas-covered surface,
- A wire clay cutter,
- A small amount of water only if the teacher allows it,
- An apron or work clothes,
- Clean hands free of lotion or debris.
- The surface should not be slippery. A stable work area helps the student use body weight safely and effectively.
- Body position matters during the wedging process. Students should:
- Stand with feet about shoulder-width apart;
- Keep the clay at a comfortable height;
- Lean slightly forward from the hips;
- Use the palms and the heel of the hands;
- Let body weight help push the clay
- This posture reduces strain in the wrists and arms. Wedging should use controlled force, not frantic motion.
- During wedging ceramic clay, students should pay attention to the feel of the material. Good clay gradually becomes:
- Smoother
- More even in firmness
- Less sticky in isolated spots
- Less crumbly in dry spots
- Easier to shape into a clean form
- If the clay tears badly, it may be too dry. If it collapses and sticks heavily to the table, it may be too wet.
Tips
- Students often ask how long they should wedge. There is no single
number that fits every situation, because the amount depends on the size
and condition of the clay. In many classrooms, a small amount of fresh
clay may need only a short period of steady wedging, while recycled or
uneven clay may need more time. The goal is not simply to count pushes.
The goal is to achieve a uniform, workable mass.
- A useful way to check progress is to cut the clay with a wire tool. After wedging, the inside should show:
- Few or no visible air holes
- Even color and texture
- No sharp wet-dry contrast
- A compact, unified structure
-
If large bubbles or streaks appear, the student should continue
wedging. This inspection helps students connect the hidden interior
condition of the clay to the visible quality of their work.
Students should also avoid common mistakes:
- Pressing down without folding in a pattern
- Working too fast and losing control
- Folding the clay over on itself in a way that traps air
- Adding too much water
- Wedging on a dirty surface
- Stopping before the clay becomes consistent
These errors can undo the benefits of wedging. Careful habits matter as much as strength.
-
Cleanliness is part of good clay preparation. Dust, dried scraps, glaze
residue, and bits of plaster should never mix into workable clay.
Plaster is especially dangerous in a ceramics studio because small
pieces can absorb water and later cause clay to pop or break. Students
should keep the wedging table clean, remove hard crumbs from the clay,
and return unused material to the proper storage area.
- Teachers
often connect wedging to the idea of a ceramics workflow. Ceramics is
not only about making finished objects; it asks students to respect
process. In schools and studios across many places, potters have long
understood that preparation affects outcome. A well-made cup or
sculpture often begins with careful clay conditioning.
- The results of successful wedging should be clear to both teachers and students. Properly prepared clay should:
- Feel uniform from one end to the other
- Hold together without cracking apart
- Contain no visible air pockets
- Respond evenly to shaping
- Be ready for handbuilding or wheel work
When students reach this stage, they are more likely to build forms that stay strong through drying and firing.
-
For handbuilding projects, wedging ceramic clay supports stronger
construction. Coils attach more securely, slabs roll with fewer weak
spots, and pinch pots form with more even wall thickness. Because the
clay behaves consistently, students can focus more on design,
craftsmanship, and expression rather than on avoidable material
problems. This creates a more successful learning experience in the
secondary art classroom.
- For wheel-thrown projects, wedging is
especially important because the wheel reveals every inconsistency. Clay
that is uneven or filled with air may wobble, resist centering, or
collapse more easily. A student who takes time to complete the wedging
process often finds that centering becomes smoother and more manageable.
This does not replace practice on the wheel, but it gives the student a
much better starting point.
Summary
In summary, the wedging purpose is practical and essential. Wedging
prepares clay by blending moisture, reducing air pockets, improving
texture, and increasing control. Students can choose from methods such
as ram’s head, spiral, stack-and-slam, and cut-and-slap, depending on
the clay and the classroom routine. By learning how and why to wedge,
students build a strong foundation for all future ceramics work.
Every successful ceramics project begins before the actual forming
starts. When students understand the purpose of wedging, recognize the
kinds of wedging, and practice the steps carefully, they prepare
themselves for better results. The clay should end the process smooth,
even, workable, and ready to use. In that sense, wedging is not just
preparation. It is the first act of craftsmanship in ceramics.